[15:13:47.522] ❌ [ERROR] Cannot use torch.compile with 'inductor' backend: Triton is not installed.
Triton is required for the inductor backend which performs kernel fusion and optimization.
To fix this issue:
  1. Install Triton: pip install triton
  2. OR change backend to 'cudagraphs' (lightweight, no Triton needed)
  3. OR disable torch.compile
For more info: https://github.com/triton-lang/triton
[15:13:47.523] ⚠️ [WARNING] torch.compile failed for VAE submodules: torch.compile with inductor backend requires Triton. Install with: pip install triton
[15:13:47.523] ⚠️ [WARNING] Falling back to uncompiled VAE
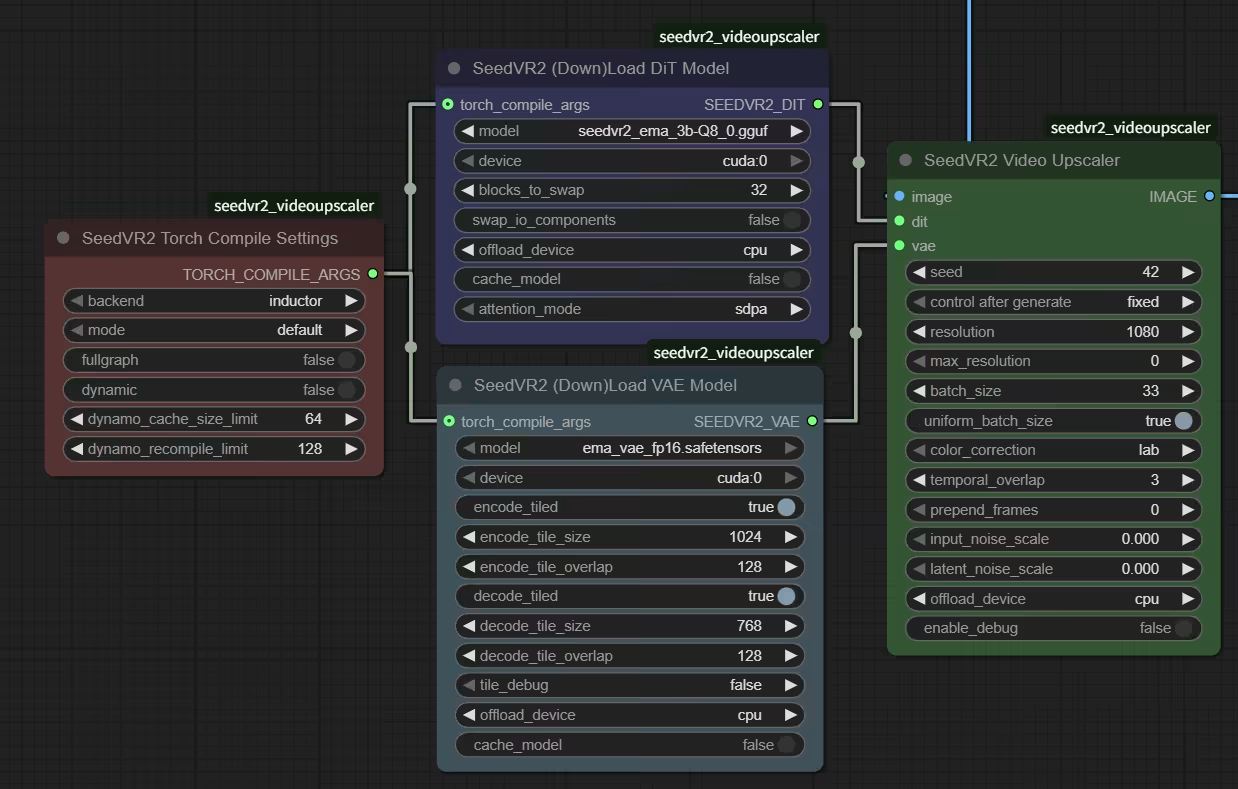
Triton がインストールされていない場合、警告が表示されます。
━━━━━━━━ Phase 2: DiT upscaling ━━━━━━━━
[15:13:49.856] ❌ [ERROR] Cannot use torch.compile with 'inductor' backend: Triton is not installed.
Triton is required for the inductor backend which performs kernel fusion and optimization.
To fix this issue:
  1. Install Triton: pip install triton
  2. OR change backend to 'cudagraphs' (lightweight, no Triton needed)
  3. OR disable torch.compile
For more info: https://github.com/triton-lang/triton
[15:13:49.857] ⚠️ [WARNING] torch.compile failed for DiT: torch.compile with inductor backend requires Triton. Install with: pip install triton
[15:13:49.857] ⚠️ [WARNING] Falling back to uncompiled model
This repository was created to address a common pain point for AI enthusiasts and developers on the Windows platform: building complex Python packages from source. Libraries like flash-attention, xformers are essential for high-performance AI tasks but often lack official pre-built wheels for Windows, forcing users into a complicated and error-prone compilation process.
The goal here is to provide a centralized, up-to-date collection of direct links to pre-compiled .whl files for these libraries, primarily for the ComfyUI community and other PyTorch users on Windows. This saves you time and lets you focus on what’s important: creating amazing things with AI.
Pick one that match your CUDA, Python, and Torch Version
For example:
Matches cu128 (CUDA 12.8), cp312 (Python 3.12), and base Torch 2.7.x.